Canva stands as a widely acclaimed graphic design tool, renowned for its capacity to craft exquisite visuals tailored for various purposes such as social media and marketing materials. Among the vital proficiencies to acquire when utilizing Canva lies the art of text wrapping around images, a skill that proves invaluable when designing layouts necessitating text to elegantly encircle an image rather than merely resting above or below it.
The good news is that the process of text wrapping within Canva is a straightforward endeavor, easily achieved with just a few simple clicks. Users can adeptly manipulate text boxes, modifying their dimensions and adjusting text placement to expertly drape text around images of diverse contours and sizes. Armed with the right techniques and a touch of practice, individuals of all skill levels can fashion professional-grade designs featuring seamlessly wrapped text using Canva.
Exploring Text Wrapping: Enhancing Readability and Design
Text wrapping, a fundamental concept in document and graphic design, involves the meticulous adjustment of text within a specified area or container, such as a text box. The primary goal is to ensure that the text adheres to the boundaries of the container, optimizing both readability and visual appeal.
Key Characteristics and Importance:
- Adaptability to Container Size: Text wrapping adapts text to conform to the dimensions of its container. This adaptation is crucial in preventing text overflow, which can disrupt the design and hinder readability;
- Aesthetic Enhancement: Proper text wrapping contributes significantly to the visual appeal of a document or design, creating a harmonious balance between text and other design elements;
- Improved Readability: By aligning text within its designated area, text wrapping ensures that the content is easily readable, avoiding the clutter and confusion that overflow can cause.
Text Wrapping in Graphic Design Tools:
- Widespread Usage: Many graphic design applications, such as Canva, incorporate text wrapping as a key feature. This integration underlines its importance in creating professional and polished designs;
- Design Flexibility: With text wrapping, designers have the freedom to experiment with various layouts and text orientations, enhancing the creative potential of their work.
The Significance of Text Wrapping in Design
Text wrapping is a pivotal element in the world of graphic design, serving multiple vital functions that extend beyond mere aesthetics. Let’s delve deeper into why mastering the art of text wrapping is indispensable for designers and how it can elevate the overall quality of your projects. Also, discover the magic of curving an image effortlessly in our step-by-step guide. Unlock creativity with ‘Curve an Image‘ techniques today!
1. Enhancing Readability and Comprehension
Text wrapping isn’t just about making text fit neatly into a box; it significantly influences the readability and comprehension of the content. When text spills out of its designated space, it becomes a daunting task for readers to follow the logical flow of the information. This issue is particularly critical when you’re working on projects that demand a specific sequence or order, such as brochures, infographics, or instructional manuals.
Recommendation: To enhance readability, ensure that your text is wrapped effectively to maintain a smooth reading experience. Pay attention to paragraph breaks, line spacing, and proper alignment.
2. Elevating Design Aesthetics
Aesthetics play a pivotal role in design, and text wrapping is a key player in this arena. Poorly wrapped text can wreak havoc on your design, making it appear unprofessional and chaotic. On the flip side, proficient text wrapping can transform your design into a visual masterpiece that captures attention and conveys your message effectively.
Tip: Experiment with various text wrapping techniques, such as drop caps, indents, and text paths, to create visually engaging designs that leave a lasting impression.
3. Ensuring Consistency and Cohesion
Consistency is the hallmark of well-crafted design, and text wrapping is your ally in achieving it. When you apply consistent text wrapping throughout your project, it fosters cohesion and harmony. This consistency extends not only to the alignment and spacing of text within individual elements but also across different elements in your design.
Insight: Utilize style guides and design templates to maintain uniformity in text wrapping across your projects, giving your work a polished and professional touch.
4. Accommodating Different Mediums
In the digital age, your designs may be viewed across various mediums, from computer screens to mobile devices and print media. Effective text wrapping ensures that your content adapts seamlessly to these different platforms, guaranteeing a consistent and user-friendly experience.
Insight: Test your designs on multiple devices and screen sizes to fine-tune text wrapping for optimal presentation across all platforms.
5. Facilitating Accessibility
Text wrapping isn’t just about aesthetics; it’s also about inclusivity. Properly wrapped text is easier to read and comprehend for individuals with visual impairments or reading disabilities. Ensuring accessibility in your designs by implementing thoughtful text wrapping practices is a mark of ethical and responsible design.
Recommendation: Consider using larger font sizes, ample white space, and alternative text descriptions to make your content more accessible to a diverse audience.
Mastering Text Wrapping in Canva: A Step-by-Step Guide
If you’re looking to elevate your design game with Canva, one essential skill to have in your toolkit is text wrapping. This creative feature allows you to seamlessly blend your text with graphics, making your designs more engaging and visually appealing. In this comprehensive guide, we’ll walk you through the steps to wrap text in Canva and offer valuable insights and tips to make your designs truly stand out.
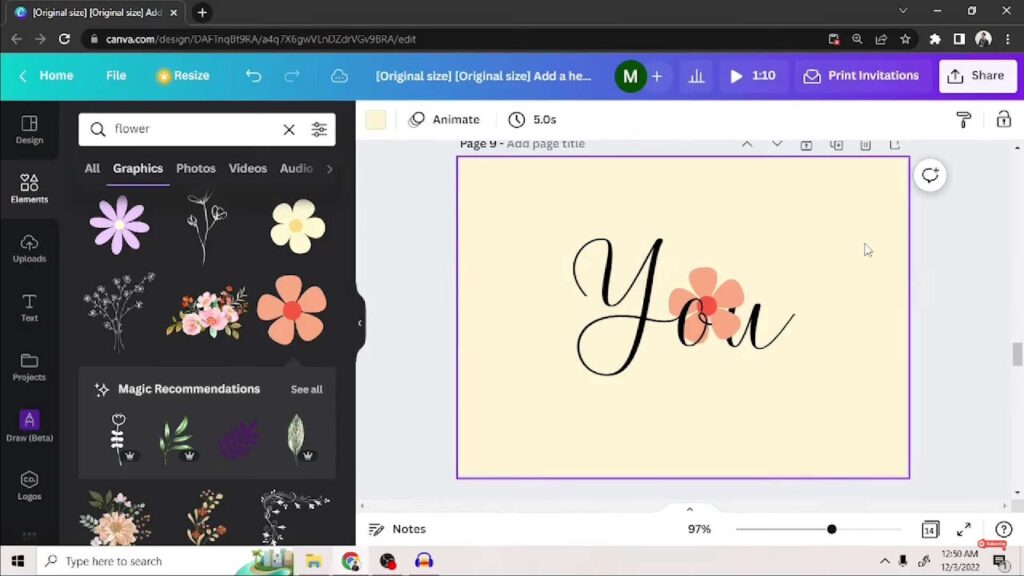
Step 1: Selecting the Text Box
To kickstart your text wrapping journey in Canva, the first thing you need to do is select the text box containing your text. This sets the stage for the magic to happen. Here’s how to do it:
- Launch Canva and open your project;
- Locate the text box you want to wrap your text around;
- Click on the text box with your mouse cursor to select it;
- Pro Tip: If you don’t have a text box in your project yet, you can easily create one by clicking on the “Text” option in the left-hand toolbar and then clicking anywhere on your canvas to add a text box.
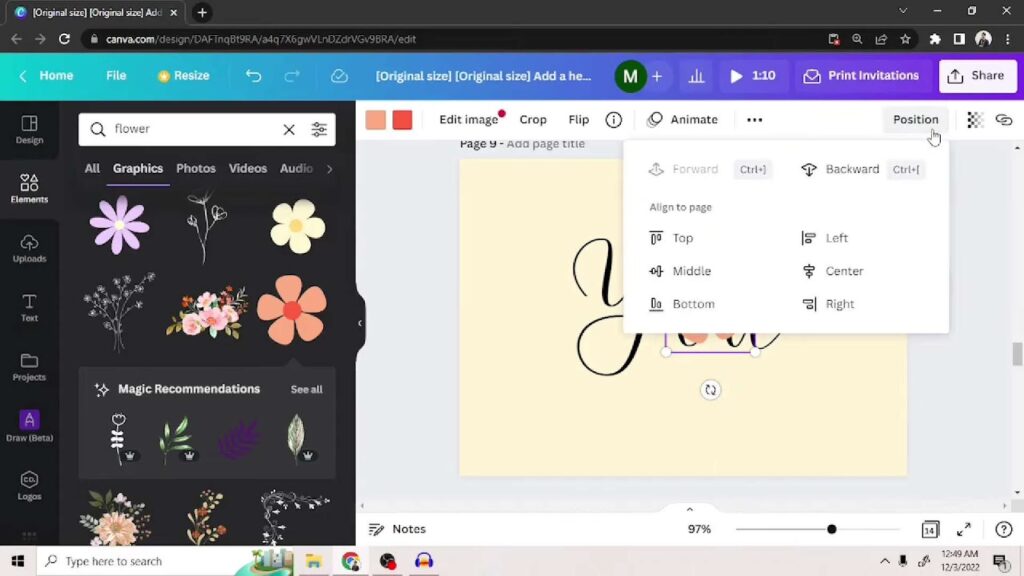
Step 2: Accessing Text Options
Once you’ve got your text box selected, it’s time to dive into the world of text wrapping. This is where you can unleash your creativity and make your text flow harmoniously with your design elements. Follow these steps:
- With your text box selected, shift your attention to the toolbar at the top of the Canva interface;
- Look for the “Text Options” button and give it a satisfying click;
- Pro Tip: The “Text Options” button is your gateway to a treasure trove of text editing possibilities. Don’t hesitate to explore its other features beyond text wrapping, such as font styles, text size, and more, to further enhance your design.
Exploring Text Wrapping Options in Canva
Now that you’ve accessed the “Text Options” menu, you’ll find a variety of text wrapping options that can transform your design. Let’s delve into each one and discover how to make the most of them:
- Wrap Around a Shape: This option allows you to wrap your text around a specific shape, such as a circle or a square. Perfect for creating eye-catching labels or emphasizing key elements;
- Wrap Around an Image: When you have an image in your design, this feature lets you wrap text around it, blending text and visuals seamlessly. Ideal for adding captions to images or creating captivating posters;
- Wrap Around Frame: If you’ve added a frame to your design, this option ensures your text gracefully adapts to the shape of the frame. It’s great for designing invitations, greeting cards, or stylish photo collages;
- Wrap Around a Transparent Element: When you’ve used a transparent element in your project, like a shape with transparency, you can make your text flow around it effortlessly. This is fantastic for highlighting specific areas of your design or creating an artistic touch;
- Expert Advice: Experiment with different text wrapping options to see which one suits your design best. Combining multiple text boxes with various wrapping styles can lead to truly unique and captivating results.
Explore Text Wrapping in Canva
In your creative journey with Canva, it’s essential to harness the power of text wrapping to take your designs to the next level. To begin, navigate to the “Text Options” menu, and within its realm, you’ll find the treasure trove of possibilities known as “Text Wrap.” As you embark on this visual adventure, consider the various options available to you:
- Basic Wrap: This option wraps text around objects, creating a harmonious fusion of text and visuals. Ideal for captions, sidebars, and creative layouts;
- Tight Wrap: Choose this if you want the text to cling closely to the edges of your object, highlighting the details within. Perfect for showcasing intricate illustrations or photographs;
- Square Wrap: For a clean and organized look, opt for square wrap. It creates a precise boundary around your text, making it suitable for infographics and data-driven designs;
- Loose Wrap: If you prefer a more relaxed and flowing text integration, loose wrap allows for more space between your text and the object. Great for artistic compositions and elegant designs.
Fine-Tune Your Text Wrapping Settings
Now that you’ve chosen your preferred text wrapping option, it’s time to make it uniquely yours. Canva empowers you with customizable settings to achieve the perfect text-object relationship:
- Adjust Margin: Utilize the slider bar to fine-tune the distance between your text and the edges of the object. Experiment with different margins to achieve the desired balance;
- Wrapping Styles: Explore the dropdown menu to experiment with various wrapping styles, which can include options like top, bottom, left, or right. These styles determine how the text wraps around your object;
- Alignment: Consider aligning your text within the text box to control its position relative to the object. Centering, left-aligning, or right-aligning text can have a significant impact on the overall visual appeal;
- Text Effects: Don’t forget to play with text effects like shadows, highlights, or even changing the font style to enhance the text’s integration with the object.
Conclusion
Enveloping text within Canva involves a straightforward procedure, which has the potential to significantly enhance the overall aesthetic of your designs. Manipulating the dimensions of your text box affords you the ability to wield control over the presentation of your text, ensuring it snugly integrates with your design.
Maintain the integrity of your text box by keeping it ungrouped, and with a mere click upon any of the white pill handles, you can seamlessly customize the size of your text box. As you reduce the dimensions of the text box, the text content will automatically reconfigure, either wrapping itself gracefully onto the subsequent line or elegantly overflowing as needed.
I trust you have gleaned utility from this comprehensive guide on how to execute text wrapping within Canva!